How to Convert a Image Into Vector Art Using Illustrator
At that place are 2 types of digital images: rasters and vectors.
Raster images are fabricated upward of individual pixels and contain tremendous amounts of item. Even so, yous tin can't overstate them without losing quality.
A vector image is made from lines and shapes. They're usually less detailed, but you can make them every bit big as you like without losing annihilation.
When yous've got a raster graphic that's too small for your needs, the solution is to catechumen the prototype to a vector, and you can exercise this in Adobe Illustrator. It's a quick and simple process and produces excellent results. Here's how to convert an image to a vector using Adobe Illustrator.
What Is a Vector Image?
A vector epitome is a scalable paradigm made up of values rather than pixels.
Most images found online are raster images. Raster images apply square pixels (bits of color) to convey an prototype. Vector graphics convey colour using scalable color polygons. Since vector images use dynamic color sections instead of static squares, they provide perfect lines and crisp colors.
The geometry which comprises vector images is formulaic, making them resolution-independent. That ways images don't lose quality when they're scaled up or down, since the colour polygons in a vector image will ever maintain their shape. The aforementioned is not true for raster images, since the colour information of these images is stretched when scaled.
You can easily tell the divergence between the ii types of image through their file format. Raster images are mutual image types like JPG and GIF, while vector images typically have the SVG, EPS, or AI format.
One time you know how to convert a JPG file to a vector in Adobe Illustrator, you'll be able to calibration anything you lot find to the size you want—without losing image quality. So let's get started on turning an paradigm into a vector.
Footstep one: Option an Image to Convert to Vector
The image you lot use won't thing when using the following procedure, except for the fact that larger images will take longer to edit. There are some images, nevertheless, that work ameliorate as vector images than others.
It's better to edit a single bailiwick than a landscape or the like. Preferably, the image should have a white or transparent background and have a relatively low resolution. It'll need to be in a format like JPG, GIF, or PNG.

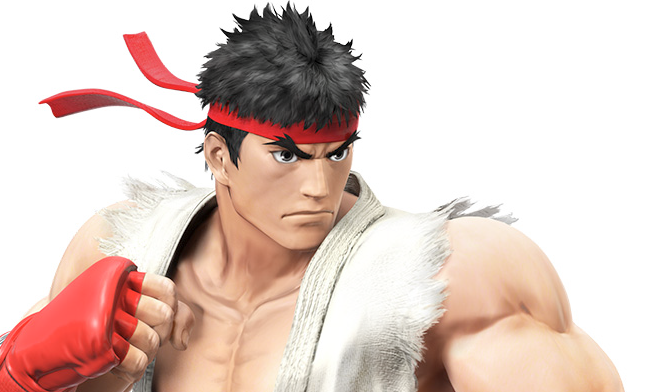
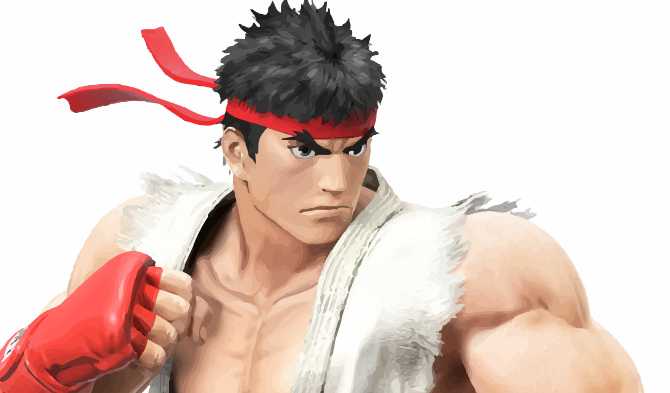
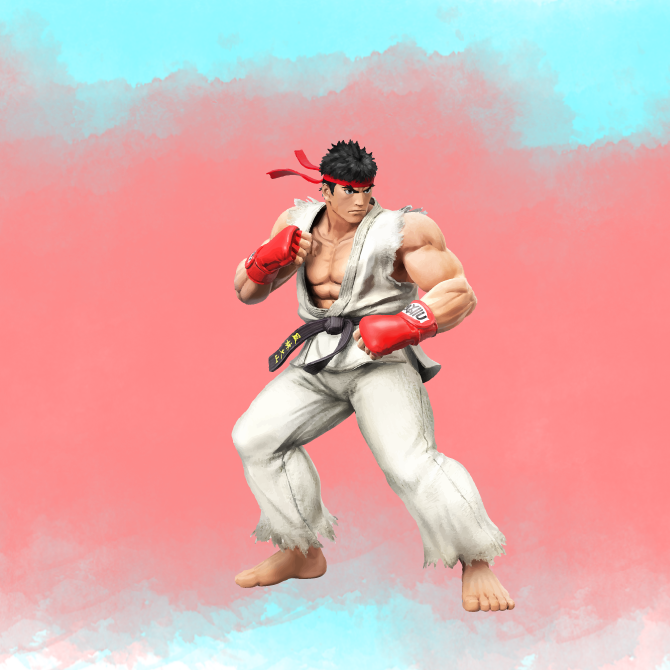
We'll exist using the image of Ryu from the Street Fighter series above. It works as a perfect example for a multifariousness of reasons. For one, it's a single subject. It too lends itself to a vector epitome format well, as it's a recognizable graphic symbol. The vector prototype format is typically used for logos, icons, or recognizable images.
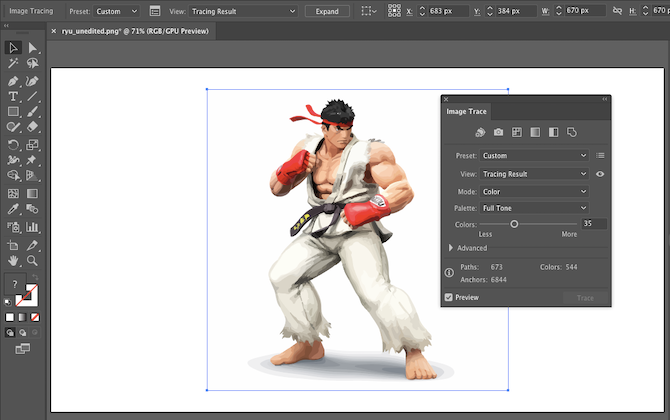
Step 2: Select an Prototype Trace Preset
Illustrator has a special tool that lets you vectorize images. It's called Epitome Trace and it comes with a range of presets that do most of the work automatically.
Broadly speaking, you should apply the Paradigm Trace preset that most closely resembles the type of paradigm you're converting, every bit each one produces different results.
Your options are:
- High Fidelity Photo and Low Fidelity Photograph. These produce very detailed, and slightly less detailed vector images respectively. They're ideal for photos or circuitous artwork, such every bit the instance image we're using.
- 3 Colors, 6 Colors, and sixteen Colors. These presets output vector images with three, six, or sixteen colors. They're perfect for logos or artwork with lots of apartment colors.
- Shades of Grey. This preset produces a detailed grayscale prototype.
- Blackness and White Logo. This creates a uncomplicated logo with two colors—black and white.
- Sketched Art, Silhouettes, Line Fine art, and Technical Drawing. These are all-time used for specific types of images, and create blackness and white, predominantly line-based drawings.
To get started, open your image in Illustrator and select it to activate the image options. These options should exist present at the top of your Illustrator window.
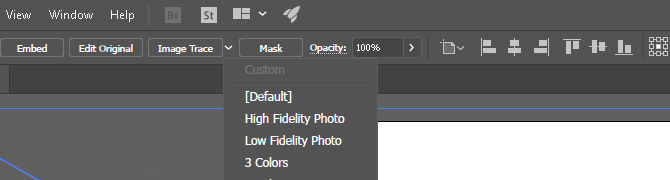
Click the dropdown pointer next to Image Trace to select your Preset. Nosotros'll be using Depression Allegiance Photo. Click information technology to begin tracing.
Step iii: Vectorize the Image With Prototype Trace
Once you click the button, your paradigm volition go through the tracing process automatically. You'll notice several changes to your prototype, only overall it should remain much the same. For example, the following is a closeup of our epitome before the tracing procedure.
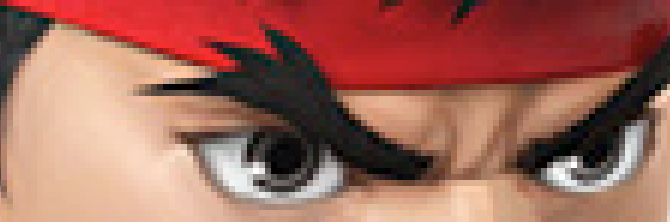
Notation the pixelation. Here is the prototype after the process:
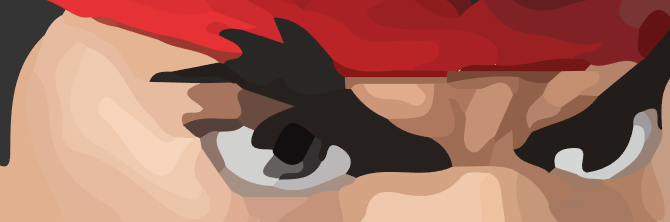
While much of the detail has been stripped from the original image, the traced version appears much sharper. You'll note the color shapes practise not pixelate no matter how close the image is zoomed.
Zoomed out, the prototype should wait virtually the same. Hither is our overall image earlier editing:
Hither is our paradigm later on editing:
While the top prototype may appear sharper in some instances, the quality of our vectorized image is still pretty impressive.
Step iv: Fine-Tune Your Traced Image
One time yous've traced the paradigm, open the Image Trace panel from the Window card to fine-tune the conversion.
Select Mode to switch between colour, grayscale, and black and white. Also, drag the Colors slider left to simplify your vector image, or right to add together more item.
If you're happy with your settings and want to reuse them, click the Manage Presets push button next to the Presets option. You can now save your settings as a new Preset.
Pace v: Ungroup Colors
Your paradigm has now been ordered into colored shapes plumbing equipment the original raster image. In order to finish vectorizing your image, you'll need to separate these colour groups to edit them. To practice so, select your traced paradigm and click on the Aggrandize button on the top of the window.

This will allow you lot to view the composite shapes which make up the vector paradigm. Each of the shapes is outlined in blue. Next, right-click the epitome and select Ungroup in the menu. This volition allow you to separate your color shapes into individual parts.
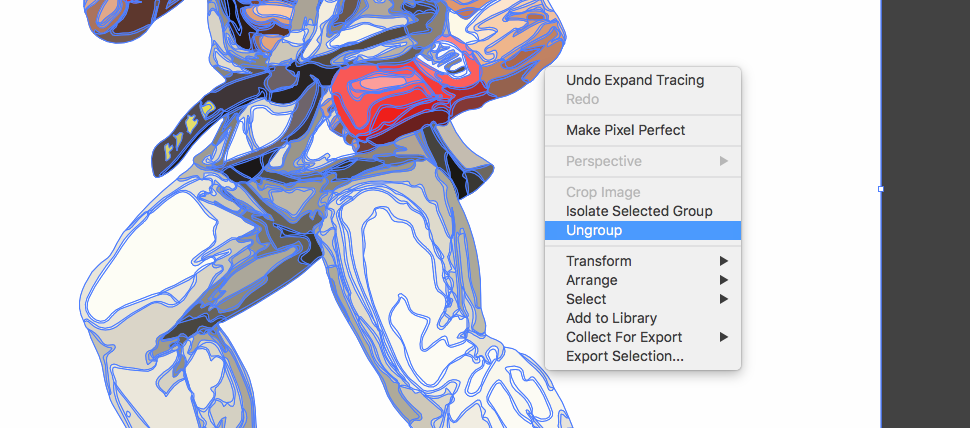
In your Layers panel, yous'll see that your color groups have been separated into layers.
Pace 6: Edit Your Vector Image
Subsequently converting a raster image to a vector, you have free range to edit the image.
Begin by deleting whatever color groups you desire. You tin can select whole color groups by clicking on a shape and heading to Select > Same > Fill Colour. This will select all groups with the same color as the one selected using your Direct Selection tool (A).
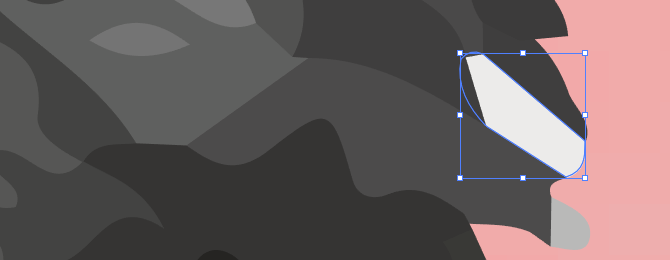
Then hit Backspace on your keyboard to delete the shapes. If y'all'd like to modify or aggrandize a particular colour group, you tin do that too past selecting a layer using the Directly Selection tool. After you've selected a layer, fill in empty spaces or add additional colors to your blueprint using the Pen or Brush tools.
Step 7: Save Your Image
Hither is the original epitome subsequently deleting the pesky white background and modifying the image slightly using the method presented above.
Now we're ready for the concluding pace in converting an image to a vector in Illustrator: saving the image in a vector format to preserve its quality. There are a diversity of vector image formats to choose between: PDF, AI, EPS, SVG, and others. Nosotros'll use the SVG format, which has broad support across all design programs and is also supported on the web.
When y'all're finished with your prototype, head to File > Consign > Export Every bit. In the following window, championship your file and select SVG in the dropdown menu beside Save as type.
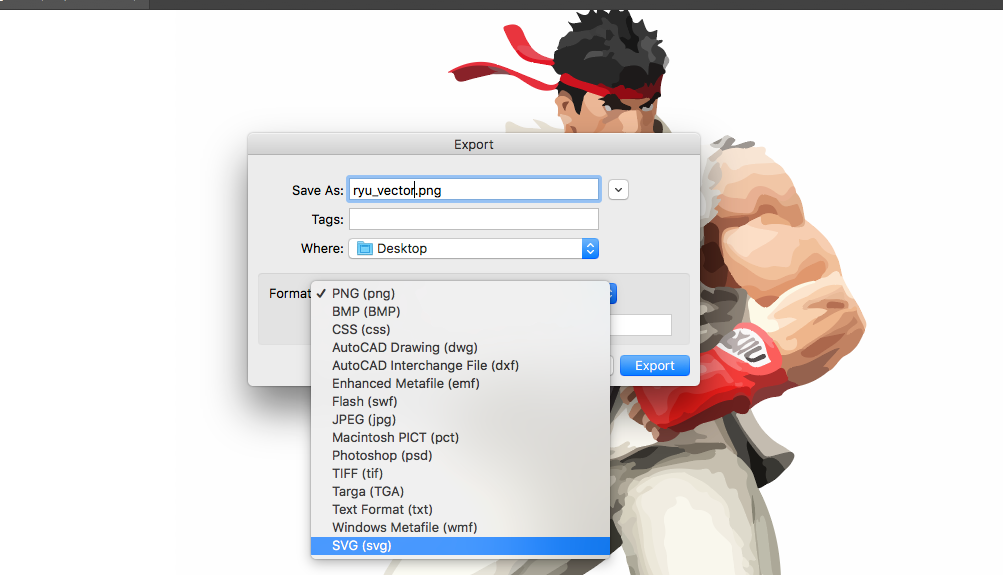
That's it. Your scalable vector file should now be saved onto your computer.
Information technology's Piece of cake to Larn How to Vectorize an Image
At present y'all know how to convert an image to a vector in Illustrator. You can scale your new cosmos to any dimension you wish, without any loss of quality.
Keep in mind that complex vector files can be significantly larger than their raster counterparts. That means they may have longer to load and edit. Nevertheless, your vector image will maintain its quality no thing the scale.
About The Author

Source: https://www.makeuseof.com/tag/convert-image-vector-illustrator/
0 Response to "How to Convert a Image Into Vector Art Using Illustrator"
Post a Comment